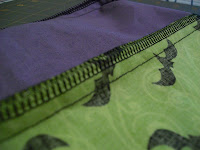
These are the Halloween treat bags that Hillary made.

This is the fabric that makes up the Halloween treat bags that Hillary made.

This is the tutorial that is used on the fabric that makes up the Halloween treat bags that Hillary made.
Supplies needed~
Main color - 1/2 yard
Center panel - 1/2 Fat Quarter contrasting color
Embellishments~
Black - 2 small 5"x5" squares
Batting - 5"x5"
Start with your center panel fabric and cut in half so you have 2-9x22" pieces. Trim selvages from one to make a 9"x21" piece.

Set the other strip aside. You will not need it for this bag.
From your main color cut 1- 5" strip the WOF. Sub cut into 2-21" strips. From the remaining fabric fold fabric in half (selvages down) and in half the other way so you have 8 thicknesses of fabric and 4 folds. Click here to print the pattern for the handle. Place on the fold & cut out as directed. After cutting out the pattern, cut through the indicated fold. Not both folds!

You should have 4 full handles with a cut through the center of the lower strip. Place 2 fabric pieces right sides together and sew along the outer edge & repeat. I would suggest serging or adding a zigzag to help secure the seams since kids can be pretty hard on these :) They should look like one of these. For your own reference I will be serging the edges of my treat bags.

Open both handles and place right sides of both pieces together and sew the side seams down

leaving the ends and edges that will be the rim and lower center front seams open

Put lower center seams right sides together and sew to form the rim of the bag.

Your handle and bag rim are finished! Press it flat and let's move on to the bag.

Sew 1- 5x21" strip to both sides of your center panel

Sew these seams 1/2" thick and finish the edges to secure them. (these bags are unlined)

Fold the bag right sides together vertically and sew side seams together at 1/2" thick again.
Pin the bag rim in place along the edge of the sewn bag, matching side seams. Pin the main fabric flat to the rim and find the center of the center panel and match that to the center seam.

Sew together, lightly gathering the center panel. Serge or zigzag the other rim edge.
Flip everything right side out.

Turn the inside rim edge under and topstitch around the seam catching the inside edge to hold it in place.

Add whatever embellishments you like :) I drew a little bat mirroring the fabric design and cut it out from my black fabric and batting made a quilt sandwich and free motioned stitched around the edge twice, then attached him to the bag by stitching him in place around the head and base of his wings.

Happy trick or treating!
Now it's your turn. These are the comments that are left by the people who liked the tutorial that is used on the fabric that makes up the Halloween treat bags that Hillary made.
Maybe will even get some picture links to people who've tried it and now have some seriously stylish kids ready to paint the town Halloween night!
Maybe will even get some picture links to people who've tried it and now have some seriously stylish kids ready to paint the town Halloween night!


